
8.The Purchase Process
Purchases Orders
If you or someone in your team raises purchase orders in your business then this could save you a lot of time because purchase orders can be converted to bills once you have received the invoice.
Skip this section if you don’t use Purchase Orders in your business. If you are unsure what a purchase order is take a look at this:
Business >>>>>>>>> Purchase orders

Click New Purchase Order
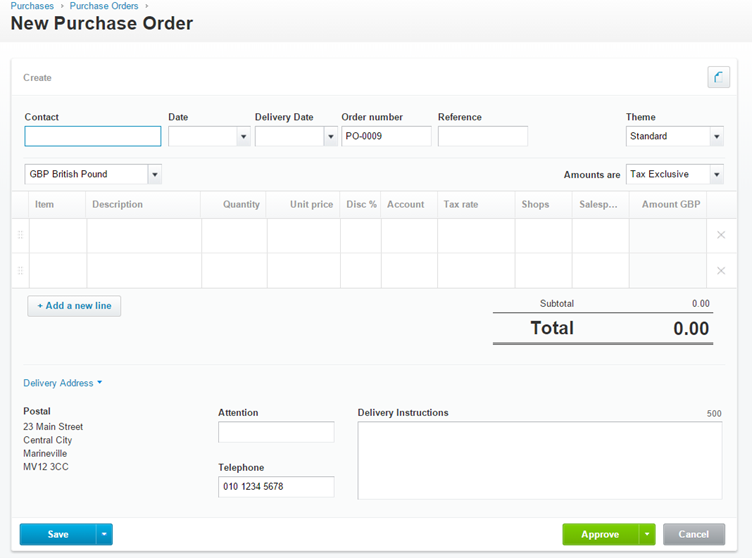
You may be getting used to these inputs by now it uses the same format, almost, as the quote and sales invoice.
The contacts are your contacts or you enter a new one.
Delivery Date – This is a new field where you specify the desired delivery date.
Purchase Order – this is set automatic
Reference – optional
Branding – Select your theme
Item – Either select an item to pre-fill the boxes and track stock or enter your description
You can also specify on the sheet bespoke delivery instructions.
Finally, you can save as a draft or Approve it.
When you have completed your purchase order it may look a bit like this.
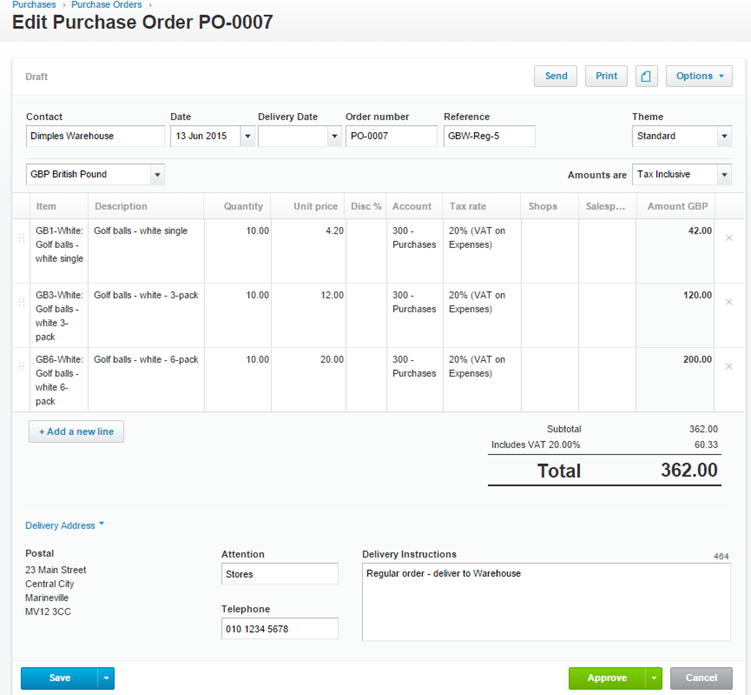
Now you have a number of options:
- Print the Purchase order to PDF and either post or email it outside of Xero
- Email the purchase order directly to your supplier
The next stage of the purchasing cycle is to mark the purchase order as billed:

This is telling Xero that you have received the items and are happy. At this point, you could update the quantity received if it differs.
Once you click marked as billed you get the option to copy this purchase invoice to a draft bill.
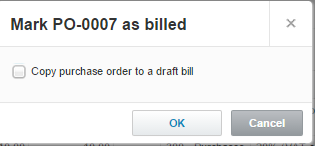
If you tick this Xero creates a draft bill and saves you the hassle of entering this information again.
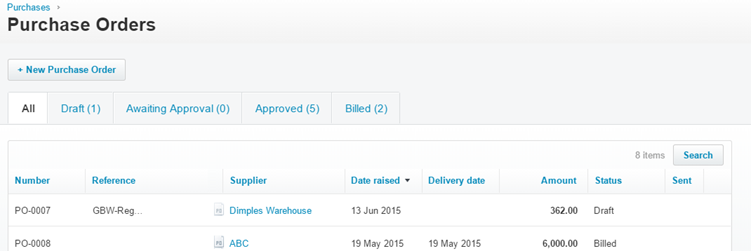
Progress of Purchase Orders
The purchase order screen allows you to track the progress of your purchase orders.
")
Purchase Invoices
There are two ways of getting Purchase Invoices into Xero.
- Manually
- Automated
Automation
Automation is the process of using a 3rd party add on to read the information on your purchase invoices and converting them into a digital format that Xero can read.
This is our preferred method because it eliminates the use of paper (you can throw the invoices away once they have been scanned) and errors by reducing the amount of manual keying of data.
Our preferred software provider Automation of purchase ledger is:

www.hubdoc.com because it is owned by Xero and currently included in your Xero subscriptions price.
Automation is beyond the scope of this course but have a read of our blog on why we love Hubdoc and we are happy to demo this to clients for free – speak to your Client Manager. You can learn more about Hubdoc here: Introducing Hubdoc.
Manually Entering Purchase Invoices
BUSINESS >>> PURCHASES OVERVIEW >>>> NEW
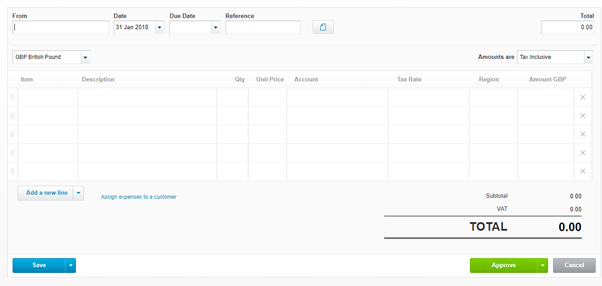
You will definitely be starting to recognise this screen It’s exactly the same as the sales invoice screen.
The Key Fields are:
To: Enter the name of your contact – it will autofill if you have a contact already set up
Date: The date on the invoice
Due Date: The date the invoice is due (remember to use +30 and that these can be pre-filled)
Reference – Enter the suppliers invoice number here.
Select Item – Select pre-filled item or type description – This will update your stock of this item if you track inventory
If you are not using a pre-filled item then enter the details of what you have bought using the heading for guidance.
Account – Xero uses account names and numbers but is more interested in the name – so type where you want to post it such as electricity, rent, motor expenses and Xero presents you with a choice. You can always add a new account here.
")
VAT
As with Sales invoices beware of your VAT default of the account you are using, it might be different than the invoice you are posting.
Also sometimes the supplier invoice will have a VAT amount that is different from the amount Xero calculated. To adjust this look for this symbol ![]() next to the Tax Rate this will allow you to post an adjustment to the VAT. This only appears if the invoice is set to exclusive VAT.
next to the Tax Rate this will allow you to post an adjustment to the VAT. This only appears if the invoice is set to exclusive VAT.
Once you have entered your info and either saved or approved. Then you will be looking at something like this:

You have the email and print options again.
In addition, you can have the additional options of:
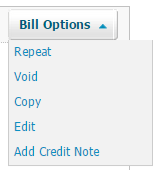
It’s not worth going through these again as they do exactly the same as the sale invoices. E.g.
Repeat – set up this invoice to repeat every month
Void – Remove this invoice as if you haven’t posted it
Copy – Copy the invoice detail to send another invoice
Add a credit note to this specific invoice.
Again you can add a credit note directly allocated to a specific invoice or you can a general credit note from the purchase screen.
Bank Payments
As on the sales invoice, you have the option on the purchase invoice to mark the bill as paid. You may want to do this the moment the bill is paid to keep your ledgers up to date. This is optional though and not 100% necessary – more will become clear when you move onto the bank section.
You do this via this screen at the bottom of an unpaid invoice.

Again all this does is mark the billed as paid, remove it from your creditors / payables list and put an unreconciled item in the bank transactions waiting for this item to come out of the bank.
Dealing with Bills Paid Personally By the Director
Suppose a director pays for fuel on his personal credit card and wants this logged. Normally we would just apply this as a credit to his / her director’s loan account.
To do this you would post the bill as normal via Accounts >>> Purchases and then once its posted use this screen to post a manual payment:
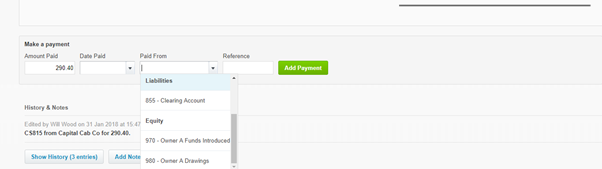
Instead of choosing a bank account for the payment to come out, you choose the director’s loan account or Owners Funds Introduced in the case of a sole trade or partnership.
This pays off the purchase invoice and then credits the director’s loan. If you wanted to reimburse the director then you wouldn’t take this step you would just pay out of the normal bank account and optionally mark it as such here.